New member
- Joined
- Oct 16, 2023
- Messages
- 28
- Thread Author
- #1
You all have mobile phones, and did you know that the traffic from mobile devices is higher? Today I will tell you how to use your iphone and buckets, not only for what would have to sit in the FB)
Let us carding with IOS and ANDROID
IOS setup
And so, first, let's discuss some details. Why iOS? Everything is simple. The fact is that to work in this area with pc, you will need a very detailed and time-consuming setup, as well as the purchase of additional material for driving. We have the same story with Android. It will not be easy for beginners in this business. Therefore, it is best to do this from your iPhone or iPad. Even if you don’t have iOS, don’t skimp and buy a simple five on the subway. They now cost about $ 70. But on the other hand, it will help you save a lot of time and money on material for work. Moreover, you can quickly recoup it.
Well? Let's move on to setting up?
First, we need to install vpn. To do this, go to the AppStore and write in the search “Batternet” and download it ??
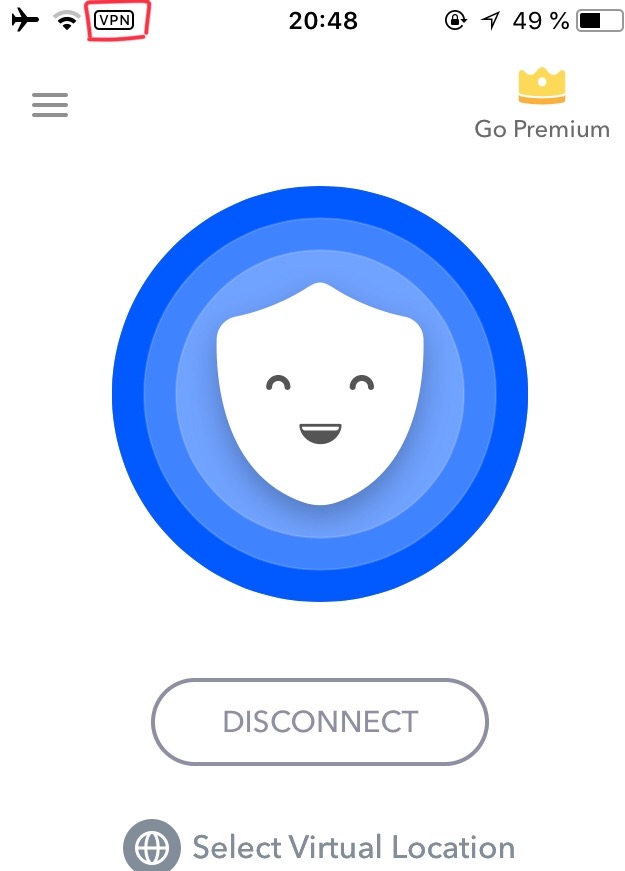
Have you downloaded it? Fine. Now go there and click “connect” and confirm the vpn installation. After connecting, it should look like this ??

Okay, now go to whoer.net and check the percentage of anonymity. Initially, we will have no more than 70%
We need at least 80% to be successful. To raise the percentage of anonymity, we need to change the system language to English and the time zone. The site tells us about it
And he's right, go to settings> general> date and time. Uncheck "automatically" and set the time zone that whoer.net indicated to us in the screenshot above. Then we go back, go to the language and region> iPhone language and change it to English.
Making sure that everything has changed

And go back to whoer.net ??
As you can see in the screenshot, the level of our anonymity has risen to 100%. Now you can work in peace.
This method is very suitable for driving an e-gift, driving a credit card into shops, etc. The beauty of this method is that you do not need to spend money on Dedics, proxies, etc.
Configuring Bucket
In general, it is better to buy a bucket somewhere, average for $ 30-50, with android version 4.4 or 5.0, you can do that, on others it may be difficult to get root and install the Framework, you do not need to insert a SIM card.
Go to settings> restore and reset> reset phone settings.
After rebooting, go to the browser on the site w3bsit3-dns.com, go through the registration - download KingRoot from the
We get the root of the rights, it will take 40 minutes, I will not paint, everything is simple there, got the rights, rebooted the device, go to KingRoot, at the bottom we press "more tools"> uninstall programs, mark all Google services, delete, now follow the links and download the following programs:
1)
2)
3)
4)
5)
6)
7) Ccleaner - we clean the device
8)
After installing all this, go to Xposed, click on the top left 3 strips> search for modules> search and install:
1) RootCloak- hides root rights from shop applications.
2) XPrivacy- with this program we can prohibit or allow applications to see various information, and also change all the values associated with the SIM card.
After installation, go back to Xposed Installer, point modules, mark RootCloak, XPrivacy, Device I'd Changer.
Go to settings> about phone> click 7 times on the build number, a menu for developers appears, look for the item fictitious locations, put a tick.
Open Xposed> top right three dots> quick reboot.
Hooray! Your phone is ready to work
Now, to start driving, we go into XPrivacy, from the top right three dots> Settings> scroll down we are interested in 7 points:
1) Phone number - write the cardholder number, you can find out
2)
3)
4) Country - country cardholder
6) ICC ID - the first two digits are 89, then the country code comes, the rest of the digits should be written randomly so that in the end there are 15 characters
7) Subscriber ID - we write MCC then MNC the rest are random to in the end it was also 15
Do not forget to change the data in Device Id Changer, click Random All, or add your own, poke Apply and go to Xposed> 3 points from the top, on the right> Soft reboot (fast reboot).
That's all, your devices are ready to drive, Good luck to everyone in your work!
Let us carding with IOS and ANDROID
IOS setup
And so, first, let's discuss some details. Why iOS? Everything is simple. The fact is that to work in this area with pc, you will need a very detailed and time-consuming setup, as well as the purchase of additional material for driving. We have the same story with Android. It will not be easy for beginners in this business. Therefore, it is best to do this from your iPhone or iPad. Even if you don’t have iOS, don’t skimp and buy a simple five on the subway. They now cost about $ 70. But on the other hand, it will help you save a lot of time and money on material for work. Moreover, you can quickly recoup it.
Well? Let's move on to setting up?
First, we need to install vpn. To do this, go to the AppStore and write in the search “Batternet” and download it ??
Have you downloaded it? Fine. Now go there and click “connect” and confirm the vpn installation. After connecting, it should look like this ??

Okay, now go to whoer.net and check the percentage of anonymity. Initially, we will have no more than 70%
We need at least 80% to be successful. To raise the percentage of anonymity, we need to change the system language to English and the time zone. The site tells us about it
And he's right, go to settings> general> date and time. Uncheck "automatically" and set the time zone that whoer.net indicated to us in the screenshot above. Then we go back, go to the language and region> iPhone language and change it to English.
Making sure that everything has changed

And go back to whoer.net ??
As you can see in the screenshot, the level of our anonymity has risen to 100%. Now you can work in peace.
This method is very suitable for driving an e-gift, driving a credit card into shops, etc. The beauty of this method is that you do not need to spend money on Dedics, proxies, etc.
Configuring Bucket
In general, it is better to buy a bucket somewhere, average for $ 30-50, with android version 4.4 or 5.0, you can do that, on others it may be difficult to get root and install the Framework, you do not need to insert a SIM card.
Go to settings> restore and reset> reset phone settings.
After rebooting, go to the browser on the site w3bsit3-dns.com, go through the registration - download KingRoot from the
You do not have permission to view link
Log in or register now.
.We get the root of the rights, it will take 40 minutes, I will not paint, everything is simple there, got the rights, rebooted the device, go to KingRoot, at the bottom we press "more tools"> uninstall programs, mark all Google services, delete, now follow the links and download the following programs:
1)
You do not have permission to view link
Log in or register now.
- after installing through it, you need to immediately install the Xposed Framework.2)
You do not have permission to view link
Log in or register now.
Id Changer - changes IMEI, ID, serial number.3)
You do not have permission to view link
Log in or register now.
-
You do not have permission to view link
Log in or register now.
SSH through it4)
You do not have permission to view link
Log in or register now.
- put socks5)
You do not have permission to view link
Log in or register now.
- we change the location under cardholder.6)
You do not have permission to view link
Log in or register now.
- serves as an indicator, everything is set up, rebooted, went into the simcard and looked, made sure that the data has changed.7) Ccleaner - we clean the device
8)
You do not have permission to view link
Log in or register now.
forwarder - we correct the dns, I rarely use it, but sometimes it is necessaryAfter installing all this, go to Xposed, click on the top left 3 strips> search for modules> search and install:
1) RootCloak- hides root rights from shop applications.
2) XPrivacy- with this program we can prohibit or allow applications to see various information, and also change all the values associated with the SIM card.
After installation, go back to Xposed Installer, point modules, mark RootCloak, XPrivacy, Device I'd Changer.
Go to settings> about phone> click 7 times on the build number, a menu for developers appears, look for the item fictitious locations, put a tick.
Open Xposed> top right three dots> quick reboot.
Hooray! Your phone is ready to work
Now, to start driving, we go into XPrivacy, from the top right three dots> Settings> scroll down we are interested in 7 points:
1) Phone number - write the cardholder number, you can find out
You do not have permission to view link
Log in or register now.
.2)
You do not have permission to view link
Log in or register now.
3)
You do not have permission to view link
Log in or register now.
4) Country - country cardholder
6) ICC ID - the first two digits are 89, then the country code comes, the rest of the digits should be written randomly so that in the end there are 15 characters
7) Subscriber ID - we write MCC then MNC the rest are random to in the end it was also 15
Do not forget to change the data in Device Id Changer, click Random All, or add your own, poke Apply and go to Xposed> 3 points from the top, on the right> Soft reboot (fast reboot).
That's all, your devices are ready to drive, Good luck to everyone in your work!